Your Cart is Empty


Sort your tools first, then split them across two zones: a wall-mounted rail, pegboard, or magnetic strip for daily grabs, plus a countertop crock or rolling cart for backups. That combination solves how to arrange kitchen utensils without cabinets because it puts everything in view, and visibility is what actually keeps a cabinet-free kitchen from turning into a drawer-shaped pile on your counter. Start with the sort. Everything else in this guide builds from there.
TL;DR:
- Proper sorting involves grouping utensils by type and frequency, then purging broken or duplicate items to maximize visibility and efficiency.
- Wall-mounted systems like pegboards, rails, and magnetic strips should be placed with daily tools at eye level and mounted securely based on weight, with no heavy items from adhesive mounts.
- Countertop crocks should be limited to daily-use tools, arranged by size and function, with less-used items stored away to prevent clutter.
- For renters, adhesive hooks, tension rods, and over-door racks offer effective, non-damaging storage options suitable for various kitchen layouts and weight needs.
- Selecting durable materials like bamboo for open storage ensures longevity and sustainability, with routine cleaning and reconditioning to maintain hygiene.
Before you buy a single hook, pull every utensil out of wherever it currently lives and put it on the counter. You cannot design smart kitchen utensil storage ideas around tools you cannot see, and most of us own more duplicate spatulas than we’d like to admit.
Group by type first, then by frequency. Martha Stewart’s approach to organizing kitchen utensils starts the same way: sort by type and size, toss anything broken or duplicated, then group what’s left. Good Housekeeping breaks her method into three steps that work whether you own ten utensils or a hundred: sort, purge, then store by size in crocks. That third step matters more than people think, because a jumbled crock defeats the purpose of putting one out in the first place.
Here’s how to run your own sort:
Pro Tip: Use washi tape to outline a mock layout on your wall or counter before you commit to hooks or a crock. It peels off clean, and it lets you test whether five hooks actually fit where you pictured six.
Wall space is the most underused real estate in a cabinet-free kitchen, and three tools do most of the work: pegboards, rails with S-hooks, and magnetic strips. Organizing guides consistently point to pegboards and rails as the backbone of a cabinet-free setup, since both keep tools in arm’s reach without eating counter space.
A pegboard wins on flexibility. You can add hooks, small baskets, and even shallow shelves, then rearrange the whole layout in minutes when your cooking habits shift. A rail is the cleaner-looking cousin. Mount one strip, hang S-hooks, and you get a tidy line of tools without the pegboard’s grid pattern showing through. A magnetic strip only works for metal, so it’s built for knives, metal spatulas, and steel whisks, not your silicone spoon collection.
Layout matters as much as the system you pick:
Mounting method depends on what you’re hanging. Light items go on adhesive hooks or thin rails secured into drywall anchors. Anything heavier, especially cast iron pans or a loaded utensil crock, needs a stud or a heavy-duty rail rated for the weight. Never hang cast iron from an adhesive-only mount. A single 8-inch skillet can weigh more than most adhesive hooks are rated for, and a fall at head height near a stove is not a risk worth taking.
For readers weighing open shelving instead of a full pegboard wall, floating shelf spacing guidance is worth a look, since shelf height and depth affect how well hung tools clear the surface below them.
A crock is still the fastest way to organize kitchen tools you reach for daily, and the trick is picking the right shape for what you actually own. A wide-mouth crock swallows a spatula collection without them tangling; a narrow one keeps a smaller set standing upright and visible.
Martha Stewart’s method for arranging a crock is simple: nest by size, tallest utensils toward the back, shorter ones toward the front, so nothing gets buried and lost. That single adjustment, taller in back, shorter in front, changes a crock from a junk holder into an actual system.
A few setups worth stealing:
Keep the counter crock limited to what you touch most days. Anything used less than weekly belongs on a lower shelf, in a drawer if you have one, or tucked into a cart drawer instead of crowding your prep space. A counter with four crocks stops being organized and starts being clutter rather than better branding.
Under-shelf and under-cabinet space is easy to ignore because you never look up while cooking, but it’s some of the most efficient storage you’re not using. If you have even one shelf with a few inches of clearance underneath, you have a spot for hanging storage.
For a genuinely clever DIY fix, a rotating under-cabinet rack built from Lazy Susan hardware turns a flat piece of wood into a spinning utensil carousel that mounts to the underside of a shelf. It costs little to build and works especially well over a stretch of counter that would otherwise sit empty.
Pro Tip: Stagger your hooks in a zigzag instead of a straight line. It lets bulkier spoons and ladles hang without knocking into their neighbors every time you grab one.
If your lease says no holes, you still have real options. Adhesive hooks, tension rods, and over-door racks solve most of the same problems a drilled rail would, without putting your deposit at risk.
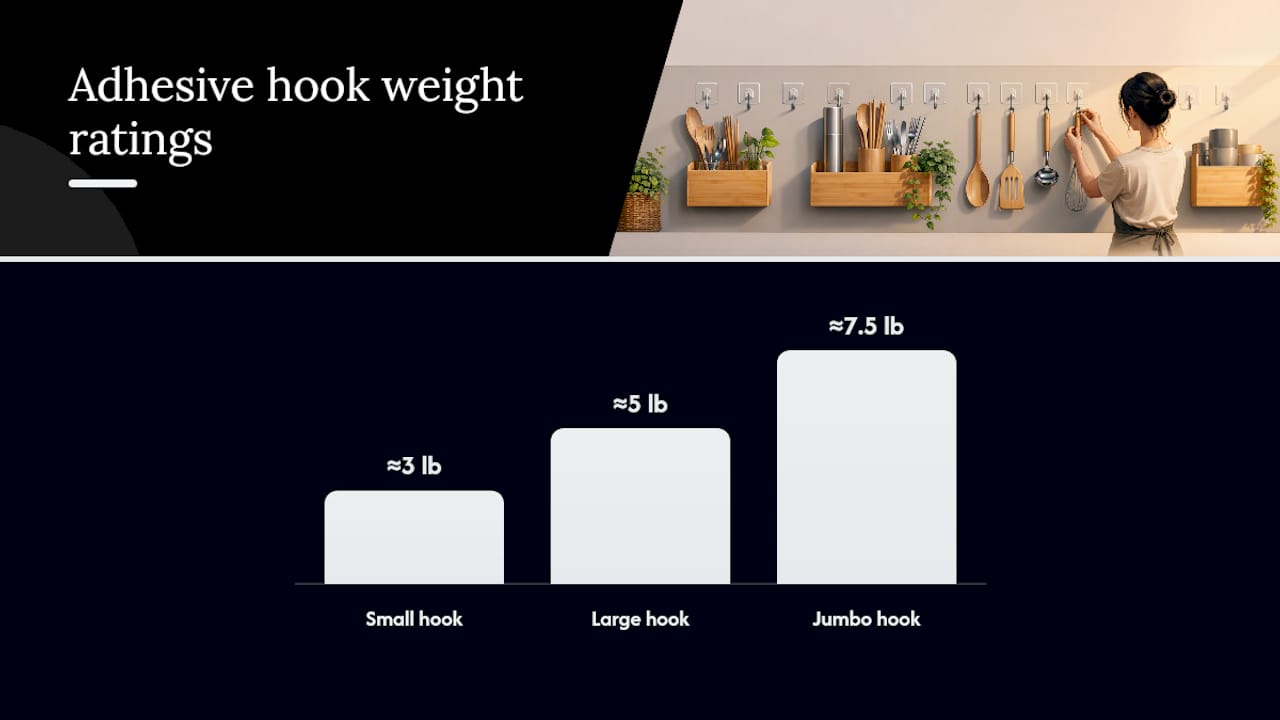
Adhesive hooks are only as good as their cure time and weight rating. Command’s published guidance puts small hooks around 3 pounds, large hooks around 5 pounds, and jumbo hooks around 7.5 pounds, and the adhesive needs its full cure time, typically 24 hours, before it carries any load. Skip that wait and you’ll find your spatula collection on the floor by morning.
A few placements to try:
Test every adhesive setup before trusting it with anything breakable. Hang a light item first, wait a day, then add weight incrementally rather than loading the hook fully on day one. Spread weight across multiple hooks on an over-door rack, too. Loading everything onto one hook on the door’s edge puts stress on the hinge over time, and that’s how a rack ends up crooked within a month.
Sometimes the wall and the counter just don’t have room, and that’s when freestanding furniture earns its keep. Rolling carts, open shelving, and pot racks can functionally replace a bank of cabinets when you organize them by zone instead of piling items on wherever there’s space.
Pick a cart by footprint before anything else. A narrow three-tier cart fits into a gap beside the fridge that a wider unit never would, and tier spacing determines whether tall items like a stand mixer or a stack of bowls will actually fit. Lockable casters matter more than most people expect. A cart that rolls away mid-stir is more than annoying; it’s a hazard near a hot stove.
Storage only works if it matches how you actually cook, and that means thinking about placement, not just containers. The five tools you use every single day, a chef’s knife, a wooden spoon, tongs, a spatula, a ladle, should live within arm’s reach of the stove or your main prep zone. Everything else can move farther away.
Pro Tip: If you’re limited on counter space, prioritize your five most-used tools for the crock or rail closest to the stove, and send everything else to vertical or cart storage. Your prep space stays clear, and the tools you actually reach for stay closest.
Open storage puts your organizers on display as much as your utensils, which makes material choice part of the design, not an afterthought. Bamboo holds up well in this role. It resists warping better than many softer woods, has a naturally tight grain that limits moisture absorption, and looks intentional sitting on a counter instead of looking like leftover garage shelving pressed into kitchen duty.
It’s also a fast-renewing material, which matters if part of your motivation for ditching cabinets is cutting down on unnecessary consumption in the first place.
Readers exploring more sustainable organizing swaps will find bamboo shows up across drawer organizers and countertop dispensers for exactly this reason: it performs well in a kitchen that has nowhere to hide its storage.
Open storage means dust, splatter, and steam land directly on your tools instead of staying shut behind a cabinet door. That’s the tradeoff nobody mentions when they show you a gorgeous pegboard photo.
A few habits keep it manageable. Store utensils with the working end down or angled away from direct stovetop splatter, so a ladle head isn’t catching grease every time you fry something. A small dish towel or a fabric cover over a crock near a busy stovetop keeps dust off tools you use less often, and it takes seconds to lift off. Wooden spoons and bamboo tools specifically need a full wash and thorough dry after each use since standing moisture is what breeds bacteria in wood grain over time.
Give your open storage a quick wipe down weekly, not just when you notice buildup. Crocks collect crumbs and dust at the bottom that you won’t see until you dump everything out, and a rail near the stove picks up a fine layer of grease faster than you’d expect. Utensils stored flat on an open shelf benefit from a light cotton liner underneath, which catches dust and is easy to shake out or toss in the wash. None of this is complicated, but skipping it is exactly how open storage gets a bad reputation for looking dirty within a month.
The material your storage system is made from determines how well it survives daily kitchen conditions, and kitchens are rougher environments than most furniture is built for. Heat, humidity, grease, and constant handling wear down cheap materials fast.
Metal wall rails and pegboards hold up well near heat sources but can show rust spots in humid kitchens if they’re not coated or stainless. Plastic crocks are lightweight and cheap, but they scratch, discolor from oil splatter, and tend to crack after a year or two of daily use. Wood, particularly bamboo, splits the difference: it’s sturdier than plastic, doesn’t conduct heat the way metal does, and ages with a patina rather than visible wear.
Adhesive-mount hardware deserves its own consideration. Cheap adhesive strips degrade faster in kitchens than in any other room, because grease residue in the air weakens the bond over time even when the hook itself never got wet. If you’re mounting near the stove, wipe the wall surface with rubbing alcohol before applying any adhesive hook, since oil residue is the number one reason mounts fail early.
Match material to location: metal near heat, wood on the counter, and reserve plastic for backup storage you’re not relying on daily.
No two cabinet-free kitchens have the same problem. A galley kitchen has narrow walls and no counter to spare. A studio kitchenette might have one wall and zero storage furniture footprint. A kitchen with a peninsula but no upper cabinets has plenty of counter but nowhere vertical to mount anything.
For narrow galley kitchens, stack storage vertically rather than horizontally. A tall, narrow pegboard section uses wall height you’re not competing for, while a wide rail would eat into an already tight walking path. Studio kitchenettes benefit most from over-door and under-shelf solutions, since a single wall has to do double duty for both cooking tools and everything else you’d normally store in cabinets. A kitchen with generous counter but no wall space is the one case where a rolling cart earns its keep over a wall mount. Roll it against an open wall when not in use, and pull it beside the stove during cooking.
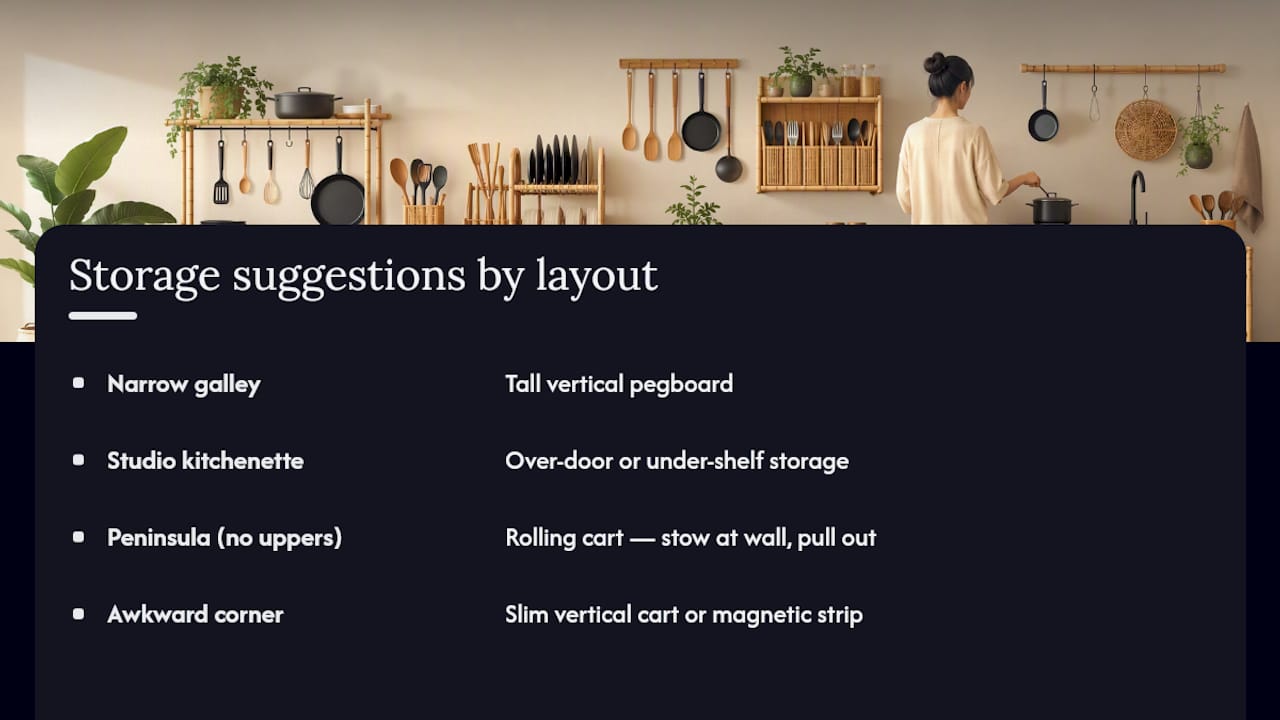
Corner spaces, often wasted in cabinet-free layouts, work well for a slim vertical cart or a corner-mounted magnetic strip, since most people skip corners entirely when planning storage. If you’re renting a space with an odd layout, measure twice before buying anything. A cart that fits one kitchen’s dead corner might block a walkway in another, and returns on furniture eat into whatever you saved by skipping cabinet installation.
Most advice about kitchen organization assumes you’ll maintain a picture-perfect system forever. Real kitchens don’t work that way. What actually holds up over months, not just for the first photogenic week, is a setup where the friction of putting something away is lower than the friction of leaving it on the counter. That’s what editing and visibility do together: fewer duplicate tools means less to store, and open storage means you’re not opening three drawers to find the spatula you use every single day.
If you’re starting from zero, don’t try to solve the whole kitchen at once. Pick two spots: a wall rail or pegboard section for your five daily tools, and a crock or renter-safe adhesive hook setup for the next tier down. Get those two right before you touch anything else. For deeper dives into specific setups, our guide on storing cutlery without drawers and our broader clutter-free kitchen ideas both build on this same two-zone thinking.
— Cozee
If you’ve landed on a countertop crock or a drawer organizer as part of your plan, the material you choose sticks around a lot longer than a sink full of plastic tubs ever will. Cozee-bay makes its organizers from handcrafted, natural bamboo specifically because it holds up to daily kitchen wear better than most lightweight alternatives, without adding another piece of plastic to a counter you’re trying to keep visually calm.

The full collection covers the exact gaps this guide walks through: countertop dispensers that pair naturally with a crock setup, drawer organizers for the one drawer you do have, and bag or wrap organizers that keep foil and ziplock boxes from turning into their own separate mess. If your countertop plan includes a paper towel stand, the countertop paper towel dispenser line is built to sit beside a crock without competing for space. For anyone juggling bags and wrap rolls loose in a drawer, the bag organizer with wrap dispenser solves that in one unit instead of three separate containers. Browse the collection to see which piece fills the gap in your own layout.
The sorting and crock method throughout this guide draws directly from Martha Stewart’s own organizing approach and its Good Housekeeping breakdown. Adhesive hook weight ratings and cure-time guidance come from Command’s product specifications on Target. The DIY under-cabinet rack idea is fully detailed on From House to Home, and freestanding storage strategies for small kitchens are covered in depth by KitchenEaseTips.
Sort your utensils by type and frequency, then split them between a wall-mounted rail or crock for daily tools and a lower-tier cart or shelf for backups.
Ratings vary by size, with small hooks around 3 pounds, large hooks around 5 pounds, and jumbo hooks around 7.5 pounds, and you should wait the full 24 hour cure time before loading them.
No, magnetic strips only hold metal tools like knives and steel spatulas, so silicone and wooden utensils still need a hook, rail, or crock.
Some tension-mounted pegboard frames exist, but most pegboards need screws into studs or anchors, so renters typically get better results from adhesive hooks, tension rods, and over-door racks instead.
Cozee-bay’s collection includes bamboo countertop dispensers, drawer organizers, and bag or wrap organizers that pair well with a crock-and-rail setup for a cabinet-free kitchen.
Wipe them down weekly with a damp cloth, dry immediately to prevent warping, and recondition with food-safe mineral oil every few months.
Comments will be approved before showing up.