Your Cart is Empty


TL;DR:
- Proper installation of touchless dispensers involves accurate placement, soap compatibility, and sensor calibration to ensure long-lasting, reliable operation. Skipping priming, neglecting routine maintenance, or choosing incompatible soap can cause malfunctions and reduce dispenser lifespan. Following detailed setup, maintenance, and placement guidelines helps facilities maintain hygiene and avoid common issues.
Touchless dispensers are automated soap or sanitizer systems that activate by infrared sensor without any physical contact. Knowing how to set up touchless dispensers correctly makes the difference between a unit that runs reliably for years and one that clogs, misfires, or gets pulled from service within weeks. Proper setup covers four factors: placement height, soap compatibility, sensor calibration, and a commissioning routine that most installers skip. Get all four right, and a well-maintained unit lasts 3–5 years in a busy commercial restroom. This guide walks facilities managers and business owners through every step.
Good installation starts before you pick up a drill. Gathering the right tools and confirming site conditions takes 20 minutes and prevents the most common callbacks.
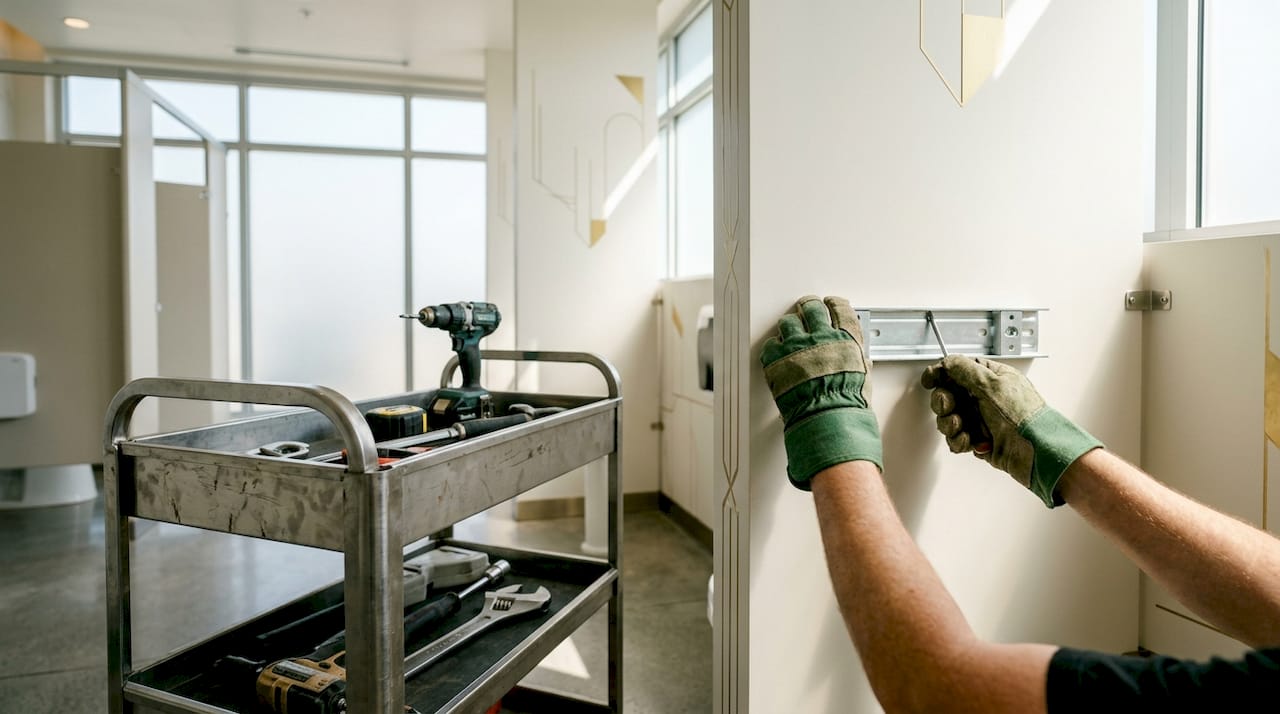
Wall-mounted units need solid backing or blocking behind the drywall. Without it, the bracket pulls free under daily use. Deck-mounted models require you to verify deck thickness and the clearance below the counter, because under-counter access is where you reach the battery pack, pump, and soap line during every future service call. Skipping this check is the single most common planning mistake in commercial installations.
Decide between battery-powered and hardwired before you order the unit. Battery models are faster to install and easier to relocate, but they require a replacement schedule. Hardwired units eliminate battery swaps but need an electrician if no outlet is nearby.
Soap compatibility is equally critical. Incompatible soaps cause pump failure, excessive foaming, and clogged nozzles within days of installation. Check the manufacturer spec sheet for the accepted viscosity range before purchasing soap in bulk.
Pro Tip: Buy a single liter of your chosen soap and run it through the dispenser for 48 hours before committing to a case order. This catches viscosity mismatches before they become a restocking problem.
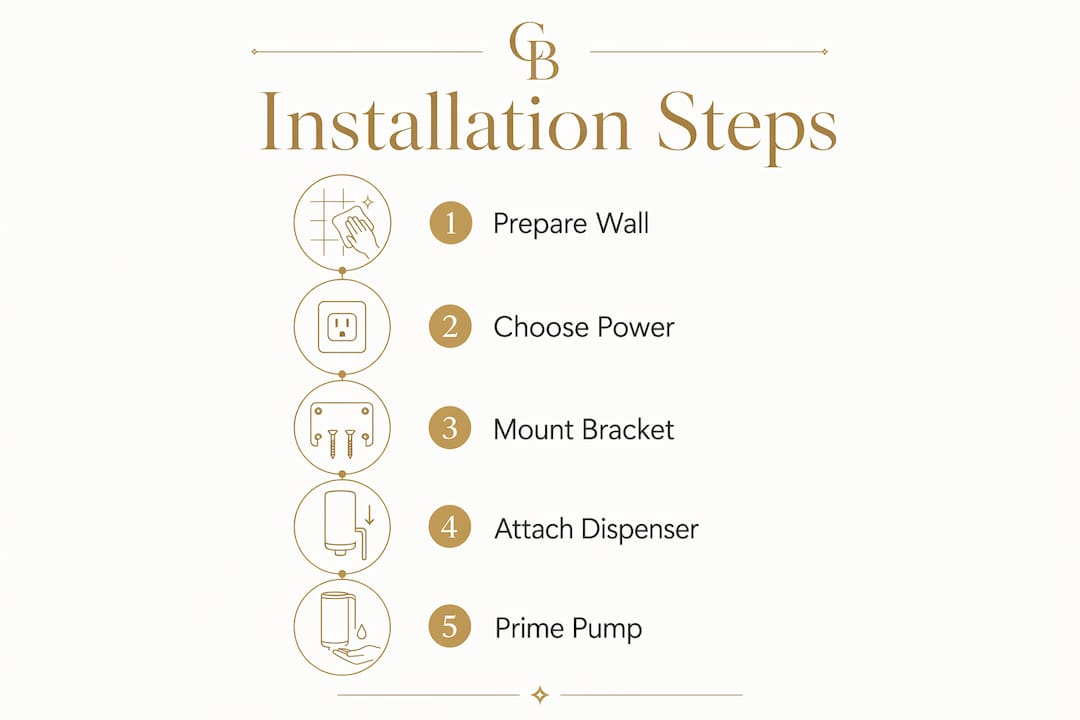
Follow these steps in order. Skipping ahead, especially the priming step, is the leading cause of “dead on arrival” service calls.
Mark the mounting location. Hold the bracket against the wall at 40–48 inches from the floor. This height range covers the reach of most adults and meets general accessibility guidelines. Use a level and pencil to mark both anchor points.
Drill and set anchors. Drill pilot holes at your marks. Tap wall anchors flush with the surface. If you hit solid blocking or a stud, anchors are optional.
Mount the bracket. Attach the bracket with the provided screws. Give it a firm tug before hanging the dispenser body. A loose bracket causes the unit to tilt and triggers false sensor reads.
Insert batteries or connect power. For battery models, install fresh, matched cells. Mixing old and new batteries shortens the set’s life and causes inconsistent sensor performance. For hardwired units, follow the manufacturer’s wiring diagram and confirm the circuit is off before connecting.
Fill the soap reservoir. Pour soap slowly to avoid air pockets. Fill to the marked maximum line. Overfilling pushes soap into the pump housing and causes drips at the nozzle.
Prime the pump. Many models require you to manually fill the inlet tube before the pump engages. Priming requires filling the inlet tube and holding the priming button for approximately 10 seconds. Skipping this step produces 5–10 dry activations before soap appears, which frustrates users and generates complaints on day one.
Calibrate the sensor. The standard sensing distance is 5–15 cm from the sensor window to the user’s hand. Adjust the sensitivity dial if your model has one. Test by passing your hand through the zone at different speeds.
Run commissioning tests. Activate the dispenser 10 times in a row. Check for consistent output volume, no drips between cycles, and no false activations when no hand is present. Confirm the sensor does not trigger from nearby movement or reflective surfaces.
Pro Tip: Tape a sheet of matte black paper behind the sensor zone during commissioning. It eliminates reflection variables and gives you a clean baseline reading before you open the restroom to users.
“Touchless” does not mean maintenance-free. Commissioning and priming are required steps, and ongoing care is what keeps a unit reliable through its full service life.
Placing dispensers in wet zones or near reflective surfaces is the fastest way to shorten unit life. Wet zones damage electrical components and cause false activations that drain batteries and frustrate users. Relocating a unit 12 inches away from a splash zone often resolves three separate complaints at once.
Pro Tip: Set a monthly calendar reminder to clean sensor windows and check battery voltage. A two-minute check prevents 90% of the service calls you would otherwise get from staff or customers.
Placement and soap choice are not afterthoughts. They determine whether your dispenser performs well on day one and stays reliable through hundreds of daily activations.
Mount dispensers at 40–48 inches from the floor to serve the widest range of users, including those in wheelchairs. Position the unit away from wet zones and reflective surfaces to prevent sensor faults and moisture damage. Coordinate dispenser location with paper towel stations and trash receptacles so the full handwashing sequence flows naturally. For high-traffic restrooms, consider pairing your soap dispenser with a bathroom safety layout review to catch accessibility gaps before they become complaints.
The table below compares liquid and foam soap options across the factors that matter most for commercial use.
| Factor | Liquid soap | Foam soap |
|---|---|---|
| Viscosity range | 1cP–100cP | Manufacturer-specific |
| Pump compatibility | Most standard pumps | Requires foam pump head |
| Coverage per dose | Moderate | High (air-infused) |
| Clog risk | Low with compatible soap | Low with correct pump |
| Cost per wash | Slightly higher | Lower (diluted concentrate) |
Foam soap delivers more coverage per dose because it is air-infused at the nozzle. That makes it cost-effective in high-volume settings like school restrooms or restaurant kitchens. Liquid soap works in a wider range of pump designs, which gives you more flexibility when sourcing refills. For guidance on choosing eco-friendly dispensers that match your soap type and space, Cozee-bay’s resource library covers both residential and commercial scenarios.
Schedule a full maintenance check every 90 days: clean the sensor, inspect the reservoir seal, test output volume, and replace batteries proactively rather than reactively. This routine keeps your units performing at full capacity and reduces the chance of a dispenser going dry during peak hours.
Reliable touchless dispenser performance depends on correct mounting height, compatible soap, a thorough priming routine, and monthly sensor maintenance.
| Point | Details |
|---|---|
| Mount at the right height | Position dispensers 40–48 inches from the floor to serve all users reliably. |
| Verify soap compatibility | Use soap within the 1cP–100cP viscosity range to prevent pump failure and clogging. |
| Always prime the pump | Fill the inlet tube and hold the priming button for 10 seconds before first use. |
| Keep sensors clean | Wipe sensor windows monthly to prevent false activations and missed triggers. |
| Avoid wet zones | Place units away from splash areas and reflective surfaces to extend service life. |
After seeing dozens of commercial dispenser setups, the pattern is consistent. The installs that generate callbacks are not the ones with bad hardware. They are the ones where the installer treated commissioning as optional.
The priming step gets skipped more than any other. The unit looks installed, the soap is in the reservoir, and the sensor lights up. So the job gets called done. Then the first 10 users get nothing, and the facilities manager gets a flood of complaints before lunch. That is entirely avoidable.
The second most common error is soap selection done after the fact. A facilities manager picks a bulk soap deal and assumes it will work. Soap chemistry mismatches with pump design are a leading cause of early failures. Verify compatibility before you buy, not after you install.
Deck-mount models deserve special attention. Installers focus on the countertop appearance and forget to check what is happening below. If there is no clearance under the counter to reach the battery pack or soap line, every future service call becomes a 45-minute job instead of a 5-minute one. Plan the under-counter access on day one.
The facilities managers who get the best long-term results treat the commissioning checklist the same way they treat a fire safety inspection. It is not optional, and it is not a formality. It is the difference between a dispenser that earns its place on the wall and one that gets replaced in six months.
— Cozee
Setting up automatic dispensers in a commercial space takes planning, and having the right resources makes the process far less stressful.

Cozee-bay offers practical guides and a curated selection of dispensers built for both style and durability in commercial environments. Whether you manage a restaurant, school, or senior living center, the commercial dispenser setup guide on the Cozee-bay blog covers placement, mounting, and maintenance in detail. For facilities managers who want a sustainable option that holds up to daily use, browse the full Cozee-bay product catalog for eco-friendly dispensers backed by a money-back guarantee and free shipping within the contiguous U.S.
Touchless dispensers use an infrared sensor to detect a hand within 5–15 cm of the sensor window, then trigger a pump to release a measured dose of soap or sanitizer. No physical contact is required at any point in the cycle.
Mount the dispenser 40–48 inches from the floor. This range serves most adults and accommodates wheelchair users without requiring a separate accessible unit.
The most common causes are an empty reservoir, a pump that was never primed, or a clogged nozzle from incompatible soap. Reprime the pump by filling the inlet tube and holding the priming button for 10 seconds, then retest.
Clean the sensor window monthly and perform a full maintenance check every 90 days. Replace batteries proactively rather than waiting for the low-battery indicator to appear.
No. Use only soaps within the viscosity range specified by the manufacturer, typically 1cP–100cP for liquid soap. Incompatible soaps cause pump failure, excessive foaming, and clogged nozzles.
Comments will be approved before showing up.