Your Cart is Empty


How to Organize Commercial Kitchens for Maximum Efficiency
Running a commercial kitchen in a busy American restaurant or cafe means juggling tight space, quick service demands, and a growing need for sustainability. Inefficient layouts and cluttered equipment can slow your team down and ramp up waste. By focusing on eco-friendly kitchen organization solutions, you can simplify kitchen traffic, reduce operational frustrations, and create an environment that supports both better workflow and responsible practices. This guide walks you through practical strategies to optimize your space for efficiency and sustainability.
Table of Contents
- Step 1: Assess Current Kitchen Layout And Workflow
- Step 2: Declutter And Categorize Essential Equipment
- Step 3: Incorporate Sustainable Storage Solutions
- Step 4: Arrange Workstations For Optimal Flow
- Step 5: Verify Organization And Efficiency Improvements
Quick Summary
| Key Takeaway | Explanation |
|---|---|
| 1. Assess Kitchen Layout | Analyze your kitchen’s physical layout and workflow by observing staff during peak times. This identifies inefficiencies and areas for improvement. |
| 2. Declutter and Categorize | Separate essential kitchen items from unnecessary ones. Organize remaining items by function to create logical workflow zones. |
| 3. Implement Sustainable Solutions | Replace worn-out containers with eco-friendly alternatives. This enhances efficiency, food safety, and reduces waste in your kitchen. |
| 4. Optimize Workstations | Arrange workstations based on workflow to minimize unnecessary movement. Ensure each station has easy access to necessary tools and ingredients. |
| 5. Verify Organizational Changes | After reorganizing, track service times and staff movements. Collect feedback to confirm improvements and refine your changes as needed. |
Step 1: Assess Current Kitchen Layout and Workflow
Before you reorganize your commercial kitchen, you need to understand what you’re actually working with. This assessment reveals inefficiencies, bottlenecks, and opportunities that pure guesswork will miss. Spend a few hours observing your kitchen during peak service to gather honest data about how your team really moves through the space.
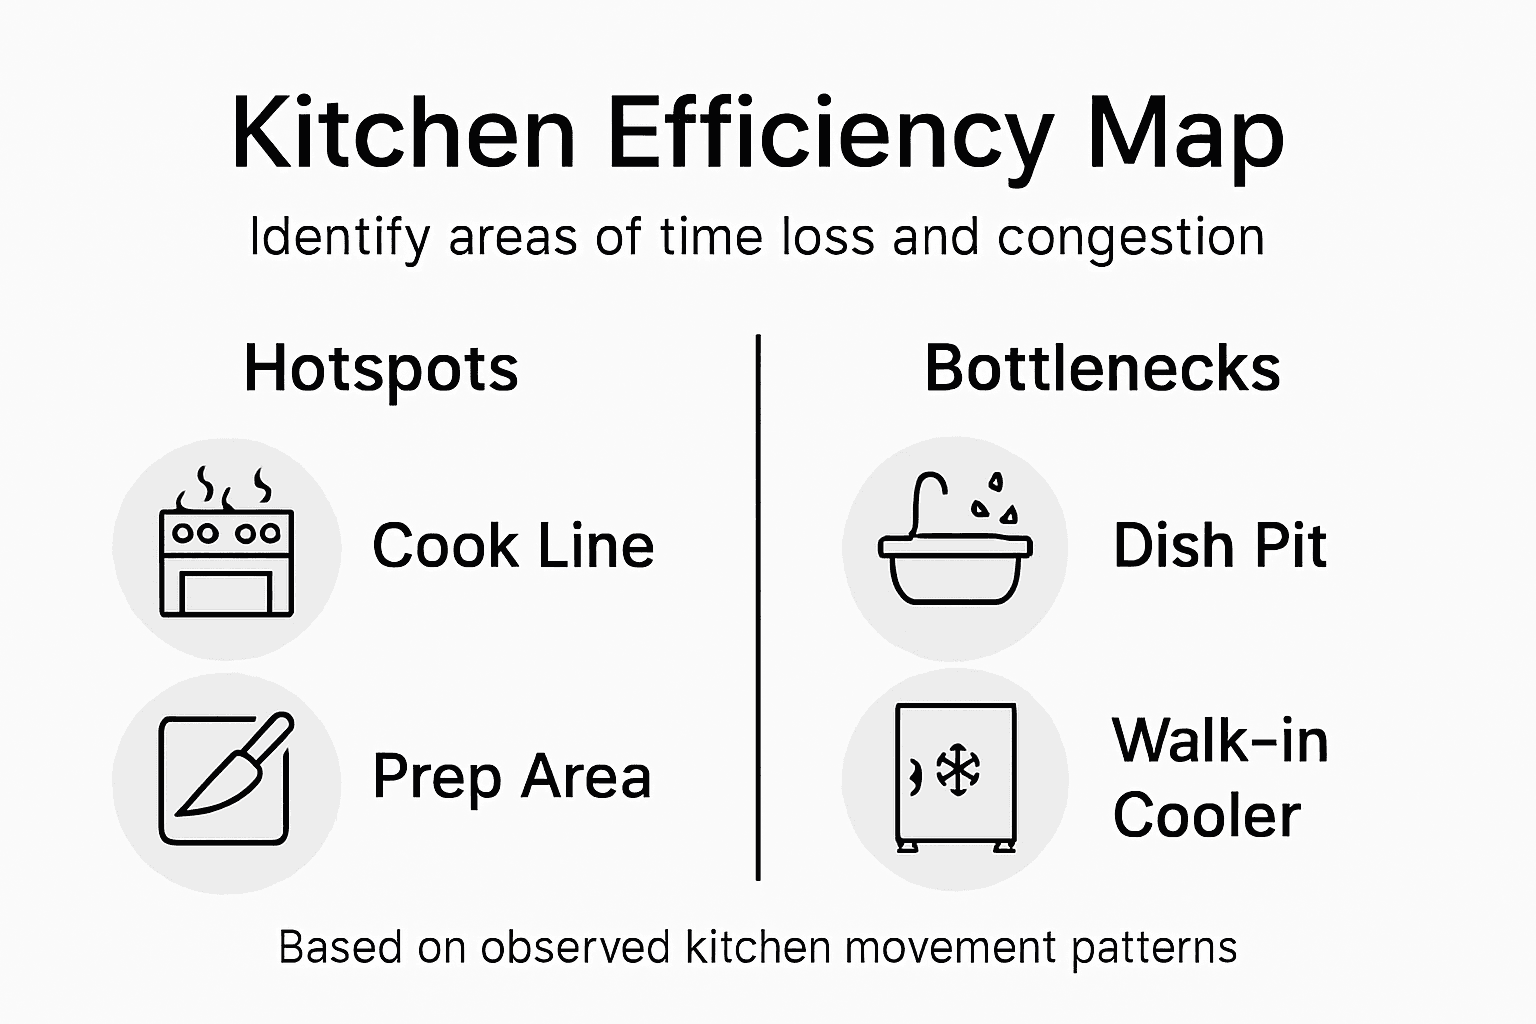
Start by mapping your physical layout. Note the location of your cook line, prep stations, walk-in cooler, dishwashing area, and any other major equipment or zones. Take a floor plan sketch if one exists, or quickly draw one yourself on graph paper. The goal isn’t architectural precision; it’s capturing where everything sits in relation to everything else. Then observe your staff’s actual movement patterns during service. Watch how many steps your prep cooks take to reach commonly used ingredients. Track how many times someone walks from the fryer to the plating station. Notice where people pause, wait, or make unnecessary detours. Research shows that real kitchen workflow patterns often diverge significantly from traditional design theories, meaning your space might have inefficiencies that nobody noticed because they’ve simply accepted them as normal.
Documentation matters here. Use your phone to take photos or video from multiple angles. Time critical tasks. Ask your team which areas frustrate them most. You’ll notice things like a prep station that’s too far from the refrigerator, a trash area that creates congestion near the cooking line, or storage for sheet pans tucked in an awkward corner that requires someone to bend down repeatedly. Look for traffic patterns that cross each other unnecessarily. When your dishwashing staff has to walk behind the cook line to access the storage room, that’s a workflow problem that organization can help address.
Evaluate your current storage solutions too. Are your most frequently used items stored at chest height or shoulder height where staff can grab them quickly, or are they buried in lower cabinets or high shelves? Is your current organization system actually working, or has it just become a chaotic free-for-all that happens to function most days? Consider how eco-friendly storage solutions could replace worn out or inefficient containers. Many restaurants find that implementing sustainable kitchen organization practices alongside this assessment creates opportunities to improve both efficiency and environmental impact simultaneously.
Pro tip: Create a simple heat map by marking on your floor plan where your team spends the most time waiting, searching, or moving back and forth. This visual will immediately show you where to focus your reorganization efforts for maximum impact.
Step 2: Declutter and Categorize Essential Equipment
Now that you understand your current workflow, it’s time to separate what you actually need from what’s just taking up valuable space. This decluttering phase removes the friction from your daily operations and creates room for intentional organization. Start by pulling every piece of equipment, utensil, and tool from your kitchen. Yes, everything. This sounds extreme, but it forces you to make deliberate decisions about what stays rather than letting outdated or duplicate items hide in the back of a cabinet.
As you pull items, create three piles: keep, donate or sell, and trash. Be honest about what you actually use. That deep fryer gathering dust in the corner probably isn’t earning its square footage. Those duplicate ladles or whisks that have accumulated over years? One set is enough. Professional kitchens benefit from systematically removing unused equipment because every item you eliminate gives your team more breathing room and faster access to what they need. Ask yourself tough questions. Does this equipment align with your current menu? Are you maintaining it regularly? Has it broken down more than once in the past year? If the answer is no to any of these, it goes. Once you’ve trimmed the excess, organize what remains by function. Commercial kitchens typically organize equipment into four main categories, which helps create clear workflow zones. Food production equipment like ranges, griddles, and fryers should cluster together near your cook line. Storage equipment, including your reach-in coolers and dry storage, belongs in a dedicated zone. Maintenance tools such as cleaning supplies and linens deserve their own area away from food prep. Specialty tools and smaller items round out the fourth category. This categorization naturally reduces clutter because everything has a logical home based on when and how your team uses it.
Within each category, organize by usage frequency. Your most frequently used items should sit at eye level and arm’s reach. A prep cook shouldn’t have to crouch to grab cutting boards they use forty times a day, nor should they stretch overhead to reach everyday utensils. Items used occasionally can occupy lower or higher shelves. Things used rarely might belong in a separate storage area altogether. Label everything clearly. Use durable, weatherproof labels on shelves, containers, and equipment so everyone knows where items belong. This prevents the slow creep of chaos where items gradually migrate to wrong locations. Consider implementing eco-friendly storage containers to replace worn out or inefficient options that waste space. Your team will move faster when they know exactly where something is without having to search or ask.

Here’s a summary of the four main kitchen equipment categories and their organizational impact:
| Equipment Category | Typical Items | Key Workflow Benefit | Organizational Focus |
|---|---|---|---|
| Food Production | Ranges, fryers, griddles | Speeds up cooking process | Group near cook line |
| Storage | Coolers, dry storage | Fast ingredient access | Zone near prep area |
| Maintenance | Cleaning tools, linens | Maintains food safety | Separate from food prep |
| Specialty/Small Tools | Peelers, thermometers | Precise food handling | Organized by usage |
Pro tip: Schedule a quarterly 30-minute audit where your team quickly checks that everything is still in its designated spot and that nothing obsolete has crept back in. This tiny habit prevents the slow slide back into disorganization.
Step 3: Incorporate Sustainable Storage Solutions
Sustainable storage isn’t just good for the environment. It directly improves your kitchen’s efficiency, food safety, and your bottom line. By replacing worn out containers and outdated storage methods with thoughtful, eco-friendly alternatives, you create a system that serves your team better while reducing waste. This step transforms your organized kitchen from merely functional to genuinely optimized.
Start by evaluating your current storage containers and systems. Are you using single-use plastic containers that crack after a few months and end up in the trash? Are your shelving units rusted or unstable? These aren’t just organizational problems, they’re efficiency drains. Replace plastic wrap and disposable containers with reusable, airtight alternatives made from glass, stainless steel, or sustainable bamboo materials. These containers maintain food freshness longer, which reduces waste and food costs. Consider investing in labeled glass storage containers that stack efficiently and make it easy to see what you have at a glance. Your prep team spends less time hunting for ingredients when visibility is clear. For dry goods storage, swap out flimsy cardboard boxes for durable, sealed containers that protect against pests and moisture. Install proper shelving with decent spacing between shelves to maximize vertical space. You can fit significantly more storage in the same footprint when you organize vertically rather than sprawling items across horizontal surfaces.
Temperature and humidity control matter more than most kitchen managers realize. Smart storage solutions with environmental monitoring systems help you track conditions in real time and catch problems before they spoil expensive ingredients. Your walk-in cooler should maintain consistent temperature without hot spots. Install thermometers you can actually read, or upgrade to digital monitoring if your budget allows. Proper ventilation in dry storage areas prevents moisture buildup that leads to mold and ingredient degradation. Consider how sustainable food storage techniques including humidity control extend shelf life and reduce waste throughout your operation. Label everything with contents and dates. Use a first-in-first-out system so older items get used before newer ones. This simple practice prevents forgotten items from dying in the back of your cooler.
For your eco-conscious restaurant or cafe, bamboo storage solutions offer durability and style. Bamboo drawer organizers, shelf dividers, and food storage containers align with sustainable values while functioning beautifully in professional kitchens. They resist moisture, look professional, and last for years. Unlike plastic alternatives that degrade and require replacement, quality bamboo items become part of your kitchen’s permanent infrastructure. As you implement these sustainable storage solutions, involve your team in the transition. Show them where items belong and explain why the new system matters. When staff understand that organized, sustainable storage directly reduces their daily frustration and makes their jobs easier, they become invested in maintaining the system.
Compare traditional and sustainable kitchen storage options to understand their business impact:
| Storage Type | Material Used | Longevity | Environmental Impact |
|---|---|---|---|
| Traditional | Single-use plastic | Short lifespan | Creates excess waste |
| Sustainable | Glass, bamboo, steel | Long-lasting | Reduces waste, reusable |
| Modern Smart | Steel, sensors | Highly durable | Reduces spoilage and waste |
Pro tip: Start with just one storage zone when implementing sustainable solutions, then expand once your team understands the system and you’ve seen the efficiency gains. This gradual approach prevents overwhelm and builds buy-in faster than overhauling everything at once.
Step 4: Arrange Workstations for Optimal Flow
Workstation arrangement determines whether your team glides through service or constantly collides and backpedals. This step puts your decluttered, organized equipment into a physical layout that mirrors how work actually happens. When stations flow logically from prep to cooking to plating, your team moves with purpose instead of zigzagging across the kitchen wasting steps and energy.
Think about your workflow as a sequence rather than a collection of stations. Raw ingredients arrive at your receiving area. They move to prep, where vegetables get cut and proteins get trimmed. Then items head to cooking stations. Finally, plated dishes travel to the expediting window. Your physical kitchen layout should support this journey, not fight it. Group related activities together so someone prepping vegetables doesn’t have to walk past the fryer to reach cutting boards and storage. Keep your dish pit away from the main cooking line to prevent water and steam from creating hazardous wet spots where cooks work. Position your plating station between the cooking area and the pass so runners can grab plates without disrupting the kitchen’s rhythm. The goal is creating distinct zones. Your storage zone should sit near your prep area. Your cooking zone should cluster your ranges, griddles, and fryers together with easy access to your prep station. Your plating and finishing zone belongs where dishes can move directly to service.
Consider ergonomics and spacing carefully. Optimizing workstations with proper station placement and spacing significantly reduces fatigue and bottlenecks during service. Don’t jam stations so close together that two people can’t work simultaneously. Leave space for movement without being wasteful. Your fastest prep cook shouldn’t have to slow down because the line cook is blocking the only path to the walk-in cooler. Keep aisles clear and wide enough for two people to pass. Mark your main traffic corridors and protect them from equipment and supplies creeping in. Look at what each station needs and place those items within arm’s reach. The fry station should have oil, breading, baskets, and drain area all within a tight radius. Your sauté station should have access to heat, your sauce bottles, and clean pans without excessive reaching or turning. Implement the practice of mise en place at every station. Each cook should have all ingredients, tools, and equipment they need for their station prepped and organized before service begins. This means no scrambling mid-service to find something.
Customize your layout to your specific menu and volume. A fine dining restaurant plating intricate dishes has completely different spatial needs than a high-volume casual cafe slinging sandwiches. A kitchen doing heavy pasta work needs different equipment placement than one specializing in grilled items. Walk through a typical service in your head or better yet, with your team. Ask where bottlenecks form. Watch where people instinctively move and where they fight the layout. Make adjustments in software before moving heavy equipment. You can sketch changes, rearrange based on budget and timeline, and test ideas without exhausting everyone by moving a six-hundred-pound range twice.
Pro tip: During a slow period, have each station cook describe their ideal arrangement in five minutes. You’ll uncover practical insights your front-of-house staff never considered, and your team feels heard when their suggestions shape the final layout.
Step 5: Verify Organization and Efficiency Improvements
You’ve reorganized your kitchen, and everything looks great on paper. Now comes the crucial part: measuring whether your changes actually work. Verification isn’t about patting yourself on the back. It’s about collecting data to confirm that your team moves faster, your food costs drop, and your operations run smoother. Without measurement, you’re just guessing.
Start by establishing baseline metrics before you made any changes. You should have noted service times and staff movements during your initial assessment. Now track the same metrics after your reorganization. How long does a typical service take compared to before? How many steps does your prep cook take during a shift? Are there fewer collisions and traffic jams? Time critical tasks like plating or mise en place setup. Ask your team if they notice a difference. Do they spend less time searching for items? Do they feel less fatigued at the end of a shift? These subjective observations matter because tired, frustrated staff lead to mistakes and turnover. Document resource usage too. Modern kitchen technology can measure improvements in water and energy consumption alongside workflow gains. A university study demonstrated that well-organized kitchens achieved nearly 48% reductions in water usage and 24% reductions in energy consumption. You might not have sophisticated monitoring systems, but you can track your utilities month to month and watch for improvements. Food waste is another critical metric. Are you throwing away less spoiled ingredients because items are better organized and more visible? Are your prep portions more consistent because tools and workstations are standardized? These changes hit your bottom line directly.
Collect feedback systematically from your team. They work in the space daily and notice things you might miss. Ask what’s working and what still frustrates them. Maybe your new layout solved one problem but created another. Maybe mise en place at a particular station takes longer than expected because tools are still awkwardly positioned. Listen without defensiveness. Your reorganization isn’t finished just because you moved equipment around. It’s an ongoing process of refinement based on real-world feedback. Consider implementing monitoring systems and data analytics to track workflow performance if your budget allows. Even basic tracking helps. Many restaurants use simple time stamps in their ordering system to monitor how long orders take from placement to plating. Comparing this data before and after reorganization shows concrete results. Schedule monthly check-ins for the first quarter after your changes. This keeps momentum and shows your team that you’re serious about the improvements. You’ll catch issues early when they’re still easy to fix. After three months, you’ll have enough data to identify patterns. Some changes will stick because they genuinely work. Others you’ll refine or adjust based on what you’ve learned. Celebrate the wins with your team. When they see that your organizational efforts actually reduced their workload or stress, they become invested in maintaining the system.
Pro tip: Create a simple before and after comparison showing one metric your team cares about, whether that’s service time, steps walked, or ingredient waste, and post it where everyone sees it regularly.
Enhance Your Commercial Kitchen Organization with Sustainable Bamboo Solutions
Reorganizing your commercial kitchen for maximum efficiency means tackling clutter, optimizing workflow, and choosing the right storage tools. This article highlights how thoughtfully arranged workstations and eco-friendly storage solutions can significantly reduce wasted steps, lessen frustration, and improve food safety. If you want to advance those goals while embracing sustainability, integrating durable, handcrafted bamboo organizers and dispensers can transform your kitchen’s daily operations.

Discover how Cozee Bay’s premium bamboo products like paper towel dispensers, food bag organizers, drawer organizers, and wrap dispensers bring lasting style and functionality to both prep and maintenance zones. Crafted from eco-conscious materials, these items support a sustainable kitchen environment without sacrificing efficiency or aesthetics. Don’t settle for worn out plastic containers and chaotic storage when you can elevate your kitchen’s organization with solutions designed for real commercial use. Visit Cozee Bay today and start optimizing your kitchen workflow while reducing waste. Explore our full selection and enjoy free shipping within the contiguous U.S. because better organization starts here with smarter, greener choices.
Frequently Asked Questions
How can I assess my current kitchen layout for efficiency?
Assess your current kitchen layout by mapping the physical arrangement and observing workflow patterns during peak service hours. Spend a few hours looking at staff movement, noting any bottlenecks or frustrations, and document areas that need improvement within one week.
What is the best way to declutter a commercial kitchen?
Start by pulling out every piece of equipment and categorizing it into three groups: keep, donate or sell, and trash. This process allows you to identify unnecessary items and reduce clutter, which improves overall workflow by creating more efficient storage space.
How should I categorize equipment in a commercial kitchen?
Categorize equipment into four main types: food production, storage, maintenance, and specialty/small tools. Organizing equipment based on how often it’s used and its function ensures that everything has a designated area, making it easier for your team to find what they need quickly.
What sustainable storage solutions can I implement in my kitchen?
Replace single-use plastic containers with reusable, durable alternatives like glass or stainless steel to reduce waste and improve food safety. Start by switching out one storage zone at a time and monitor the efficiency gains within a month.
How can I arrange workstations for optimal kitchen flow?
Arrange workstations to reflect the natural workflow from receiving to prep to cooking and plating. Ensure related activities are grouped together and maintain clear traffic lanes to minimize unnecessary movement, aiming for a layout that reduces travel time by at least 20% during peak hours.
What metrics should I track to verify improvements in my kitchen organization?
Track service times, staff movements, and resource usage before and after your organizational changes. Documenting these metrics over three months provides clear data on efficiency gains and helps you refine any areas causing ongoing issues.
Recommended
- Cozee Bay - 7 Essential Tips for Your Kitchen Organization Checklist
- Cozee Bay - How to Organize Kitchen Drawers for Maximum Efficiency
- Cozee Bay - Kitchen Decluttering Workflow: Transform Your Space Sustainably
- Cozee Bay - How to Optimize Small Kitchen Space for Eco-Friendly Living
- Cuptor electric 38L - Krmendan
Leave a comment
Comments will be approved before showing up.