Your Cart is Empty


How to Install Paper Towel Dispenser: A Step-by-Step Guide
Installing a paper towel dispenser seems like a quick weekend chore and plenty of people think all you need is a drill and a free spot on the wall. But studies show that improper installation can lead to 30 percent more dispenser breakdowns and wasted supplies. Most people miss the real trick to getting it perfectly straight and working flawlessly every time.
Table of Contents
- Step 1: Gather The Necessary Tools And Materials
- Step 2: Choose The Ideal Location For Installation
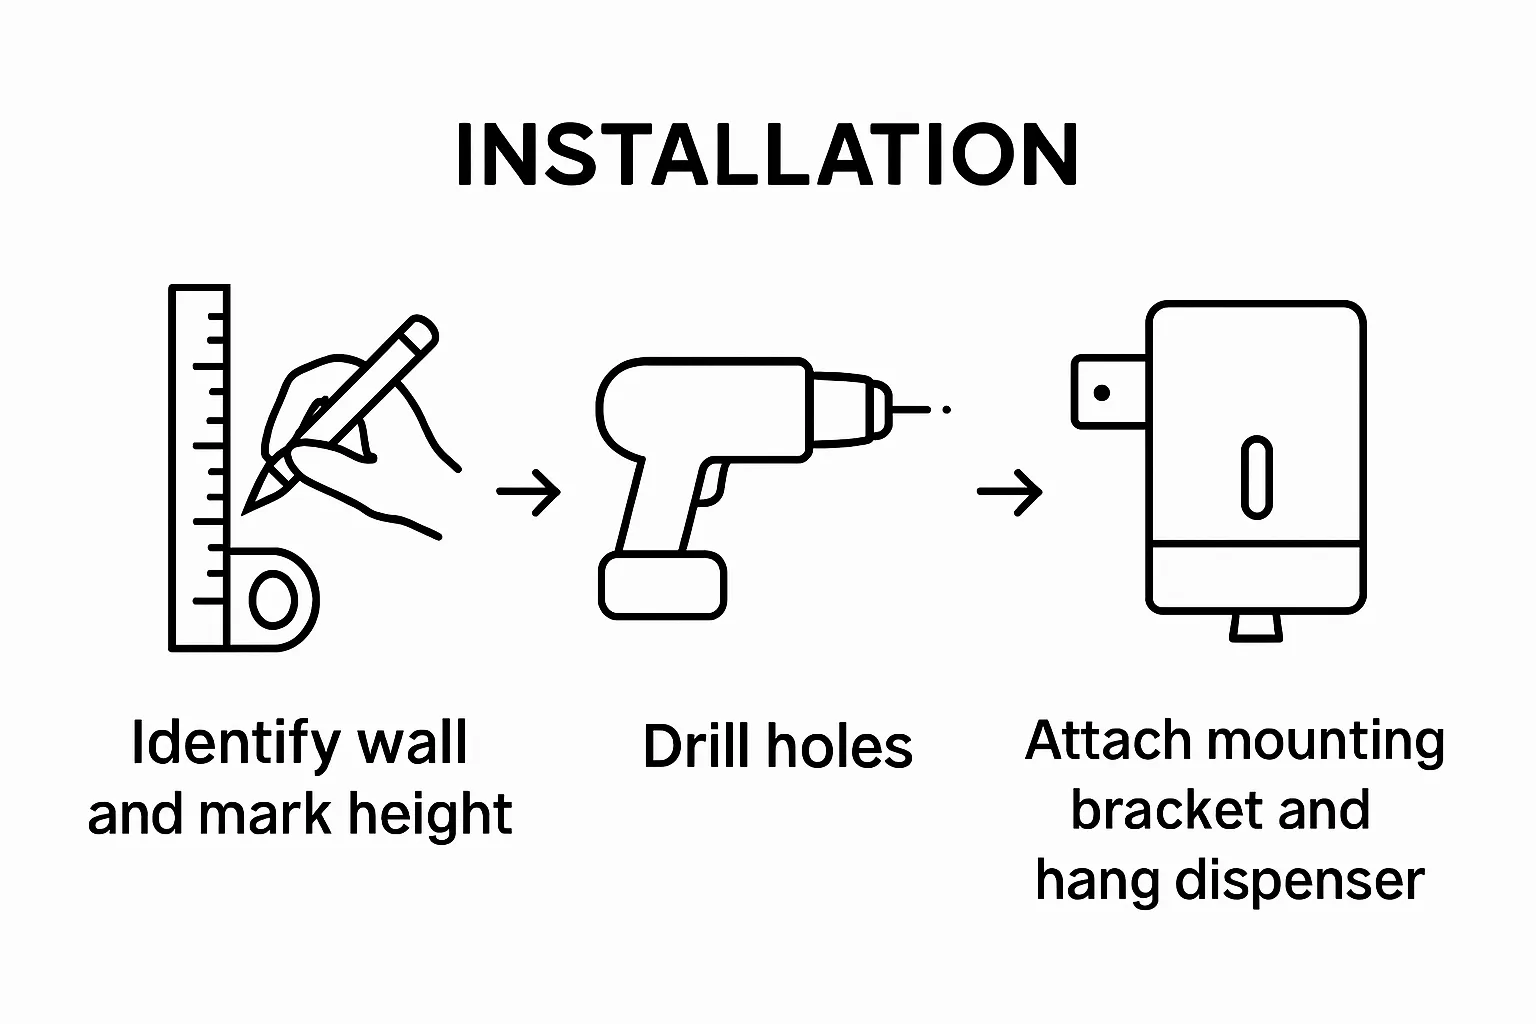
- Step 3: Mark The Mounting Position With Precision
- Step 4: Drill And Secure The Mounting Brackets
- Step 5: Install The Paper Towel Dispenser Onto The Brackets
- Step 6: Test The Dispenser For Proper Functionality
Quick Summary
| Key Point | Explanation |
|---|---|
| 1. Gather essential tools and materials | Collect a power drill, measuring tape, level, and safety equipment for a smooth installation process. |
| 2. Choose an accessible installation location | Select a place near sinks and at an ADA-compliant height for user convenience. |
| 3. Mark mounting positions precisely | Use a level and double-check measurements to avoid misalignment that could compromise functionality. |
| 4. Drill and secure mounting brackets properly | Select the right drill bit and ensure brackets are stable and securely fastened for long-term use. |
| 5. Test dispenser functionality thoroughly | Check dispensing mechanisms and alignment to ensure the paper towel dispenser works effectively and safely. |
Step 1: Gather the necessary tools and materials
Before diving into installing a paper towel dispenser, preparation is key to ensuring a smooth and successful process. The right tools and materials will make your installation efficient and prevent unnecessary frustrations. Start by creating a dedicated workspace where you can lay out all your equipment and have ample room to work comfortably.
For a standard paper towel dispenser installation, you will need several essential tools and materials. First and foremost, collect a power drill with appropriate drill bits, a measuring tape, a pencil for marking drill points, and a level to ensure your dispenser hangs straight. Safety equipment such as protective eyewear and work gloves are also recommended to protect yourself during the installation process.
The specific materials you will require depend on your mounting surface and the type of paper towel dispenser. Generally, you will need mounting hardware like wall anchors, screws, and wall mounting brackets. If you are installing in drywall, toggle bolts might be necessary for added stability. For tile or concrete surfaces, you may need special masonry drill bits and anchors designed for those materials.
Determining the precise location for your paper towel dispenser is crucial. Consider factors like accessibility, proximity to sinks or work areas, and the height at which different users can comfortably reach the dispenser. A standard recommendation is mounting the dispenser between 15 to 48 inches from the floor, depending on the intended user group. Keep in mind potential obstructions like light switches, electrical outlets, or cabinet edges that might interfere with installation.
Before beginning, double check that you have all necessary components that came with your specific paper towel dispenser. This typically includes the dispenser unit itself, mounting brackets, installation instructions, and any specialized hardware. Having everything organized and within reach will streamline your installation and reduce potential interruptions or delays.
By carefully gathering and preparing your tools and materials beforehand, you set yourself up for a successful paper towel dispenser installation. Taking these preliminary steps ensures you can proceed confidently and efficiently through the subsequent installation stages.
Step 2: Choose the ideal location for installation
Selecting the perfect location for your paper towel dispenser is more nuanced than simply finding an empty wall space. This critical step requires careful consideration of functionality, accessibility, and practical usage patterns. Your chosen location will significantly impact the dispenser’s convenience and overall effectiveness in the space.
Consider the primary purpose and traffic flow of the area where you plan to install the dispenser. In kitchen environments, proximity to the sink or cooking area makes the most sense, allowing users to quickly grab a towel after washing hands or cleaning surfaces. For bathrooms, positioning near the sink or hand washing area ensures easy access without creating obstructions. Commercial spaces like restaurants, offices, or healthcare facilities might require multiple strategic placements to maximize utility.
Mounting height and reach are crucial factors in location selection. The Americans with Disabilities Act (ADA) provides guidelines recommending that dispensers be mounted between 15 and 48 inches from the floor, ensuring accessibility for individuals of varying heights and mobility levels. In public spaces or shared environments, consider the diversity of potential users when determining the installation height.
Evaluate the wall surface and structural integrity carefully before committing to a location. Drywall, tile, concrete, and wood surfaces each present unique mounting challenges. Solid wall studs provide the most secure attachment point, offering maximum stability for your paper towel dispenser. Use a stud finder to locate these supportive structures, which will prevent potential future issues like sagging or detachment.
Take into account potential environmental factors that might impact dispenser performance. Avoid locations near direct heat sources, excessive moisture, or areas with significant temperature fluctuations. These conditions can potentially damage the dispenser or affect its mechanical components. Additionally, ensure the chosen spot allows for easy refilling and maintenance without requiring complex maneuvers or disrupting nearby activities.
Before making your final decision, perform a visual mock up by holding the dispenser against the wall and assessing its placement. Use your level to ensure straight alignment and step back to evaluate how the installation will look and function within the overall space. This simple preview can help you catch potential issues like interference with light switches, electrical outlets, or cabinet edges that might complicate the installation process.
Step 3: Mark the mounting position with precision
Precision is paramount when marking the mounting position for your paper towel dispenser. A millimeter of misalignment can lead to an uneven installation that looks unprofessional and potentially compromises the dispenser’s functionality. Begin by carefully reviewing the mounting template or installation instructions provided with your specific dispenser model, as mounting requirements can vary significantly between different designs.
Position your level horizontally against the wall to establish a perfectly straight reference line. This foundational step ensures your dispenser will be mounted perfectly horizontal, preventing an awkward or visually jarring appearance. If your dispenser requires multiple mounting points, use the level to create a horizontal baseline that will guide all subsequent markings. Take your time during this process, as rushing can lead to costly mistakes that require wall repairs or complete remounting.
Use a pencil for making initial markings, which allows for easy corrections if needed. Avoid permanent markers or pens that could leave difficult-to-remove marks on your wall. Carefully transfer the mounting bracket or template measurements, double checking each mark for accuracy. Pay special attention to the spacing between mounting holes, ensuring they align precisely with the dispenser’s specific requirements.
When working with different wall surfaces, your marking technique must adapt. For drywall, gentle, light pencil marks work best. On tile surfaces, use a piece of masking tape to create a stable marking surface that prevents pencil or marker from sliding. This technique also helps protect the tile surface from potential scratching during the marking process. For concrete or masonry walls, consider using a permanent marker that will remain visible after initial markings.
Before making any permanent marks or drill holes, perform a critical dry fit test. Hold the mounting bracket or dispenser against the wall exactly where you intend to install it. Step back and visually inspect the placement from multiple angles. Check that the location remains clear of obstacles, maintains the desired height, and looks aesthetically pleasing within the overall space. This final visual verification can save you from potential installation errors that might require extensive wall repairs.
Once you are completely satisfied with the positioning, use your measuring tape for a final precise measurement. Verify measurements multiple times before proceeding to drilling. Remember the old carpenter’s adage: measure twice, drill once. This careful approach minimizes the risk of unnecessary wall damage and ensures a professional, perfectly aligned paper towel dispenser installation.
Step 4: Drill and secure the mounting brackets
Drilling and securing mounting brackets represents a critical phase in paper towel dispenser installation that demands precision, patience, and careful technique. The success of this step will determine the long term stability and performance of your dispenser, making it essential to approach the task methodically and with proper preparation.
Begin by selecting the appropriate drill bit for your specific wall surface and mounting hardware. For standard drywall, a 3/16 inch drill bit typically works well, while masonry surfaces might require a carbide-tipped masonry bit. Always start with a smaller pilot hole to ensure accuracy, then gradually increase the hole size if needed. Wear safety glasses to protect your eyes from potential debris and dust during drilling.
When drilling, maintain a steady hand and apply consistent, moderate pressure. Position your drill perpendicular to the wall surface to ensure straight, clean holes. If you encounter resistance or feel the drill bit wandering, stop and reassess your technique. For hollow walls or areas with potential hidden electrical wiring, use a stud finder to confirm a safe drilling location and avoid potential hazards.
Depending on your wall type, you may need to insert wall anchors before securing the mounting brackets. For drywall installations, toggle bolts or plastic expansion anchors provide additional support and weight distribution. Gently tap anchors into the pre drilled holes, ensuring they sit flush with the wall surface. Some anchors require a slight rotation to expand and create a secure grip within the wall material.
Once anchors are in place, carefully align your mounting brackets with the pre drilled holes. Use a Phillips head screwdriver or power drill with the appropriate bit to secure the brackets. Tighten screws methodically, alternating between different screws to maintain even pressure and prevent bracket warping. Be cautious not to over tighten, which could strip the screw threads or damage the wall surface.
After installing the brackets, perform a stability test by gently pulling and pushing the mounted brackets. They should feel solid and show no signs of movement or wobbling. Any significant play or looseness indicates the need to recheck your mounting technique or potentially reinforce the installation. A properly secured bracket will provide a stable foundation for your paper towel dispenser, ensuring reliable performance and a professional appearance.

Step 5: Install the paper towel dispenser onto the brackets
The moment of installation has arrived, transforming your carefully prepared mounting surface into a functional paper towel solution. Carefully review the manufacturer’s specific instructions, as mounting mechanisms can vary between different dispenser models. Some designs feature direct mounting brackets, while others might require additional adapter plates or specialized attachment systems.
Begin by closely examining the mounting hardware included with your dispenser. Alignment is crucial during this phase, so take your time to understand how the dispenser connects to the previously installed wall brackets. If your dispenser comes with a locking mechanism, familiarize yourself with its operation before attempting installation. Learn more about professional paper towel dispenser installation techniques to ensure a smooth process.
Carefully position the dispenser against the mounted brackets, using your level to confirm vertical alignment. Most dispensers will have specific mounting points or slots designed to slip over the installed wall brackets. Gently slide the dispenser into position, applying even pressure to ensure a secure fit. Avoid forcing the dispenser, as this could damage either the mounting hardware or the dispenser itself.
Depending on your specific model, you may need to secure the dispenser using additional screws or locking mechanisms. Some designs feature a simple slide and lock system, while others require precise screw placement. Pay close attention to any locking tabs or securing points that ensure the dispenser remains firmly attached to the mounting brackets. A loose dispenser not only looks unprofessional but could potentially pose a safety risk in high traffic areas.
Once mounted, perform a comprehensive stability test. Gently but firmly attempt to wiggle the dispenser, checking for any excessive movement or instability. The unit should feel solid and securely attached, with minimal play or wobbling. If you detect any significant movement, carefully retighten mounting screws or reassess the bracket installation. This final verification step ensures your paper towel dispenser will function safely and reliably throughout its intended usage.
Finally, take a moment to step back and visually inspect the installation. Confirm that the dispenser is level, properly aligned, and looks aesthetically pleasing within the space. A well installed paper towel dispenser not only serves a practical purpose but also contributes to the overall design and functionality of the area.
Below is a concise checklist to help you verify each step and ensure a successful paper towel dispenser installation.
| Installation Step | Verification/Completion Check |
|---|---|
| Gather tools and materials | All necessary tools and hardware are within reach |
| Choose installation location | Location is accessible and free from obstructions |
| Mark mounting positions | All marks are level, accurate, and double-checked |
| Drill and secure brackets | Brackets are firmly attached and do not wobble |
| Mount the dispenser | Dispenser is level, flush to the wall, and aligned |
| Test dispenser functionality | Unit dispenses smoothly without jams or misalignment |
| Final visual and stability inspection | Dispenser is stable, aesthetically pleasing, and safe |
Step 6: Test the dispenser for proper functionality
Testing your newly installed paper towel dispenser is the final critical step that ensures all your careful preparation and installation work translates into practical, reliable performance. This comprehensive evaluation will help you identify and address any potential issues before considering the project complete. Explore professional insights on dispenser maintenance to enhance your understanding of long term functionality.
Begin by examining the mechanical movement of the dispenser. Most modern dispensers feature either manual or automatic dispensing mechanisms. For manual models, test the lever or handle mechanism multiple times, observing smooth, consistent paper towel extraction. Automatic dispensers require checking the sensor functionality by moving your hand in front of the unit to trigger a paper towel release. Pay close attention to the precision of the dispensing action, ensuring the towel releases cleanly without tearing or jamming.
Carefully load the paper towel roll according to the manufacturer’s specific instructions. Different dispenser models have unique loading mechanisms, so consult your installation manual for precise guidance. Verify that the roll fits correctly, with no obstructions or potential points of friction that might impede smooth towel deployment. Some dispensers require specific paper towel roll sizes or types, so confirm compatibility to prevent future operational issues.
Conduct a series of practical tests to simulate real world usage. Trigger multiple paper towel extractions, observing the consistency of the dispensing mechanism. Check that the towels emerge at the expected length and that the cutting or tearing mechanism functions smoothly. For automatic dispensers, test the sensor’s responsiveness from different angles and distances, ensuring reliable activation across various user approaches.
Pay attention to any unusual sounds, resistance, or irregular movements during testing. These could indicate minor misalignments or installation issues that require immediate adjustment. A properly installed dispenser should operate quietly and smoothly, with minimal effort required from the user. If you notice any persistent problems, carefully review the installation steps and consult the manufacturer’s troubleshooting guidelines.
Finally, perform a visual and functional inspection. Confirm that the dispenser remains securely mounted, with no visible gaps or wobbling. Check that the exterior appears flush against the wall and that all external components are properly aligned.
The following table outlines the common problems you might encounter during installation or use, their likely causes, and suggested solutions as discussed in the guide.
| Problem/Issue | Likely Cause | Solution |
|---|---|---|
| Dispenser is not level | Incorrect measurement or marking | Use a level, re-measure, and remount if necessary |
| Loose or wobbly dispenser | Insecure brackets or anchors | Tighten screws, reinforce with proper hardware |
| Jams or rough dispensing | Misaligned installation or incompatible roll | Realign unit, use manufacturer-recommended towels |
| Difficulty drilling holes | Wrong drill bit or hitting a hard surface | Use appropriate bit for material, consider anchors |
| Unresponsive automatic sensor | Blocked sensor or low battery | Clear sensor area, replace batteries if required |
Upgrade to Effortless Installation and Lasting Quality
Frustrated with tricky dispenser setups or unreliable hardware? Many readers who follow our step-by-step guide still hit roadblocks like misaligned brackets, poor fit, or dispensers that do not last in busy homes or commercial spaces. At Cozee Bay, we understand how much smoother the process is when you begin with easy-to-mount, premium bamboo paper towel dispensers made for simple installation and durable, long-term use. Explore the complete range in our Cozee Bay Paper Towel Dispenser with Adapter and Top Lid collection that solves the headaches mentioned in your project, from precise fit to elegant design.

Ready to skip the stress and enjoy a smarter, sustainable solution for your kitchen, business, or facility? Browse Commercial Paper Towel Dispensers or find the perfect accessories for flawless mounting in Paper Towel Dispensers - Accessories. Every product at Cozee Bay comes with free contiguous US shipping and a satisfaction guarantee. Click now to experience eco-friendly, trouble-free installation and smart bamboo style in every detail.
Frequently Asked Questions
How do I choose the right location to install a paper towel dispenser?
Choose a location that is easily accessible, preferably near sinks or work areas, and consider the height for various users. Generally, dispensers are mounted between 15 to 48 inches from the floor as per ADA guidelines.
What tools do I need to install a paper towel dispenser?
You’ll need a power drill, variety of drill bits, measuring tape, pencil, level, safety equipment (like protective eyewear), and specific mounting hardware like wall anchors and screws depending on the mounting surface.
How do I ensure the paper towel dispenser is installed level?
Use a level to create a horizontal reference line before marking the mounting positions. After installation, double-check the alignment with the level to ensure the dispenser hangs straight.
What should I do if the dispenser feels unstable after installation?
If the dispenser feels wobbly, check the mounting brackets and screws for tightness. Ensure that the wall anchors are properly secured, and consider reinforcing the installation with additional hardware if necessary.
Recommended
Leave a comment
Comments will be approved before showing up.