Your Cart is Empty


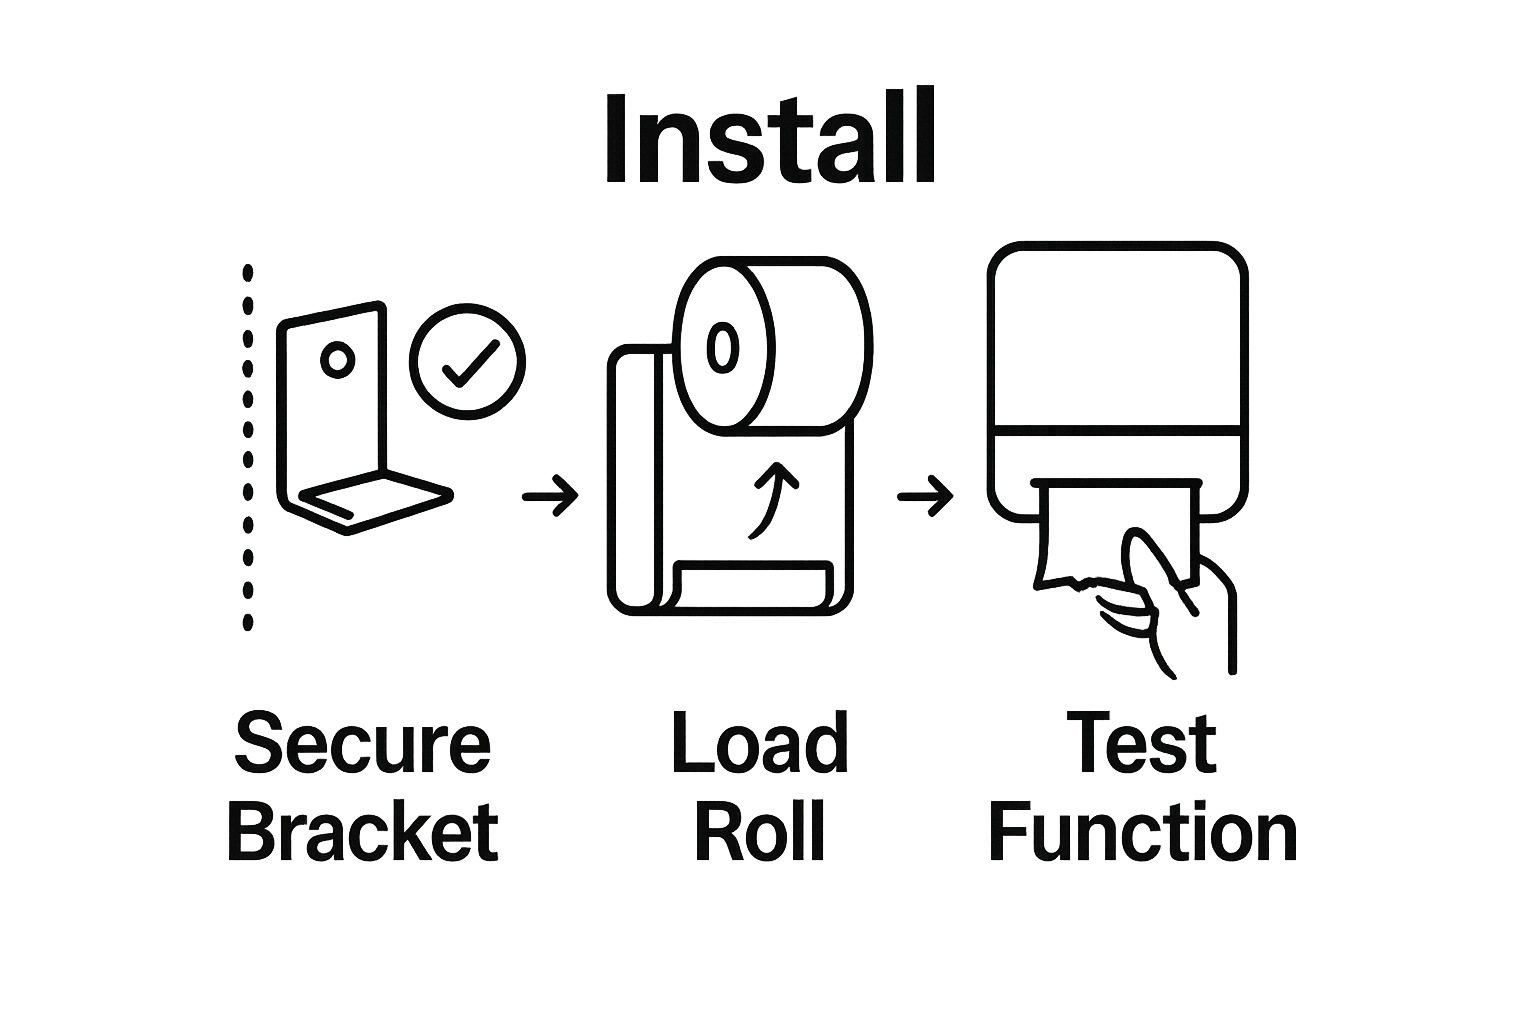
How to Set Up Paper Towel Dispenser: A Step-by-Step Guide
Installing a paper towel dispenser might sound as simple as picking a spot and grabbing a screwdriver. Yet studies show that improper placement or mounting is one of the top reasons dispensers malfunction or create user frustration. Most people rush this setup and end up with loose brackets or awkward reach that no one wants in their kitchen or bathroom. Careful planning and precise steps make all the difference if you want a dispenser that actually works every single time.
Table of Contents
- Step 1: Gather Necessary Tools And Materials
- Step 2: Select An Appropriate Location
- Step 3: Install Mounting Bracket Securely
- Step 4: Load Paper Towels Into Dispenser
- Step 5: Test Dispenser Functionality
- Step 6: Verify Proper Installation And Usage
Quick Summary
| Key Point | Explanation |
|---|---|
| 1. Gather essential tools before installation | Collect tools like a screwdriver, tape measure, and level to ensure a smooth setup. |
| 2. Choose a strategic location | Position the dispenser near sinks and consider height for accessibility and user convenience. |
| 3. Securely install the mounting bracket | Ensure the bracket is level and tightly fastened to prevent misalignment and future issues. |
| 4. Correctly load paper towels | Properly place the paper roll to assure smooth dispensing and avoid jams. |
| 5. Test dispenser functionality before use | Conduct functional tests to ensure smooth operation and make any necessary adjustments. |
Step 1: Gather Necessary Tools and Materials
Before diving into setting up your paper towel dispenser, preparation is key to ensuring a smooth and efficient installation process. Gathering the right tools and materials beforehand will save you time and prevent unnecessary interruptions during setup. Proper preparation is the foundation of successful installation.
For a typical paper towel dispenser installation, you will need a specific set of tools and materials. Most installations require basic household tools that are commonly found in toolboxes or kitchen drawers. The primary tools you should collect include a Phillips head screwdriver, measuring tape, pencil, and level. These tools will help you accurately mark mounting points and securely attach the dispenser to your chosen surface.
In addition to tools, you will want to have several materials ready. Depending on your specific paper towel dispenser model and mounting surface, you might need wall anchors, screws, or mounting brackets. Installation guidelines from building maintenance experts recommend checking the manufacturer’s specific instructions to confirm the exact mounting hardware required for your particular model.
Before beginning installation, take a moment to inspect the area where you plan to mount the dispenser. Key considerations include surface material, accessibility, and proximity to water sources or high traffic areas. Ensure the wall or mounting surface can support the weight of the dispenser and is structurally sound. Some surfaces like drywall might require additional reinforcement, while tile or concrete surfaces could need specialized anchoring techniques.
To help ensure you have everything prepared for installation, here is a table summarizing the essential tools and materials, along with their purpose and key considerations.
| Tool/Material | Purpose | Key Considerations |
|---|---|---|
| Phillips screwdriver | Used to fasten screws into the mounting | Should fit the size of screws provided by manufacturer |
| Measuring tape | For accurately measuring mounting location | Ensures correct height and placement |
| Pencil | Marking screw hole positions on wall | Use a pencil for erasable, precise marks |
| Level | Ensures mounting bracket is installed evenly | Prevents uneven installation and stress on dispenser |
| Wall anchors | Adds support for drywall or hollow walls | Type may vary by wall material |
| Screws | Attaches bracket to wall securely | Must match wall anchors and bracket type |
| Installation guide | Manufacturers reference during setup | Confirms model-specific methods and hardware |
For those installing in commercial or public spaces, additional preparation might be necessary. You may need to verify compliance with accessibility guidelines, ensuring the dispenser is mounted at an appropriate height and does not obstruct walkways or create potential hazards. Commercial installations often require more precise measurements and potentially professional assessment.
Lastly, before beginning installation, double-check that you have all necessary components from your paper towel dispenser packaging. This typically includes:
- Mounting hardware
- Dispenser unit
- Installation instructions
- Any specialized tools specific to the model
By taking time to thoroughly gather and prepare your tools and materials, you set yourself up for a successful, stress-free paper towel dispenser installation.
Step 2: Select an Appropriate Location
Choosing the right location for your paper towel dispenser is a critical step that goes beyond simply finding an empty wall space. The placement impacts functionality, accessibility, and overall user experience. Your selection will determine how convenient and practical the dispenser will be for daily use in residential or commercial settings.
Consider the specific environment and usage patterns of the space where you plan to install the dispenser. In kitchen areas, proximity to sink zones and food preparation spaces is crucial. You want the dispenser close enough to be convenient during cooking or cleaning tasks, but not so close that it risks water damage or interferes with other kitchen activities. Ergonomic design guidelines from workplace safety experts recommend positioning dispensers at a height and location that minimizes unnecessary movement and strain.
For bathroom installations, strategic placement becomes even more important. The dispenser should be easily accessible from the sink area, allowing users to grab a towel after washing hands without awkward reaching or movement. Wall stud location and mounting surface strength are critical considerations. Avoid areas with excessive moisture or direct water spray, which could compromise the mounting surface or the dispenser’s integrity over time.
In commercial environments like restaurants, offices, or public facilities, additional factors come into play. Traffic flow, wheelchair accessibility, and compliance with Americans with Disabilities Act (ADA) guidelines become paramount. The dispenser should be mounted at a height and position that accommodates users of different heights and mobility levels. Typically, this means positioning the dispenser between 15 to 48 inches from the floor, depending on specific space requirements and user demographics.
Before finalizing your location, perform a practical assessment. Use your measuring tape to verify precise dimensions and potential mounting points. Check for nearby electrical outlets, light switches, or other wall fixtures that might interfere with installation. Consider factors like wall material plastic, drywall, tile, or concrete each requires different mounting techniques and potential reinforcement.
Key verification points for location selection include:
- Sufficient clear space around the dispenser
- Sturdy mounting surface
- Convenient access for intended users
- Compliance with safety and accessibility standards
- Minimal interference with other wall fixtures
By carefully evaluating these factors, you ensure that your paper towel dispenser will be not just an installed fixture, but a functional and user-friendly addition to your space.
Step 3: Install Mounting Bracket Securely
Installing the mounting bracket is a critical phase that determines the stability and long-term performance of your paper towel dispenser. Precision and careful attention during this step will prevent future issues with mounting, alignment, and potential damage. The mounting bracket serves as the foundational support for your entire dispenser system, making it essential to approach this task with methodical care.
Begin by using your level to mark precise mounting points on the wall. Accuracy is paramount - even a slight misalignment can cause the dispenser to hang unevenly or create stress points that compromise its structural integrity. Place the mounting bracket against the wall, ensuring it is perfectly horizontal. Use your pencil to mark the screw hole locations, taking extra care to verify that these marks are level and symmetrical.
Safety experts from workplace maintenance guidelines recommend checking the wall material before drilling. Different surfaces require different anchoring techniques. For drywall, you will likely need plastic wall anchors to provide additional support. Concrete or tile surfaces might require specialized masonry anchors or drill bits to create secure mounting points.
When drilling pilot holes, use a drill bit slightly smaller than your mounting screws to ensure a tight, secure fit. Apply consistent, moderate pressure while drilling to prevent wall damage or creating oversized holes that could compromise the mounting bracket’s stability. After drilling, clear away any dust or debris using a clean cloth or small brush, ensuring a clean surface for mounting.
Secure the mounting bracket using the appropriate screws for your wall type. Tighten each screw carefully, alternating between screws to maintain even pressure and prevent the bracket from becoming misaligned. Do not overtighten, as this can strip the screw holes or crack the wall surface. The bracket should feel firm and flush against the wall with no wobbling or movement.
Verification steps for a secure mounting bracket include:
- Bracket is perfectly level
- All screws are tightened uniformly
- No visible gaps between bracket and wall
- Bracket does not move when gentle pressure is applied
- Mounting surface feels stable and solid
By meticulously following these installation guidelines, you create a robust foundation for your paper towel dispenser that will provide reliable service and maintain a professional, well-maintained appearance in your chosen space.
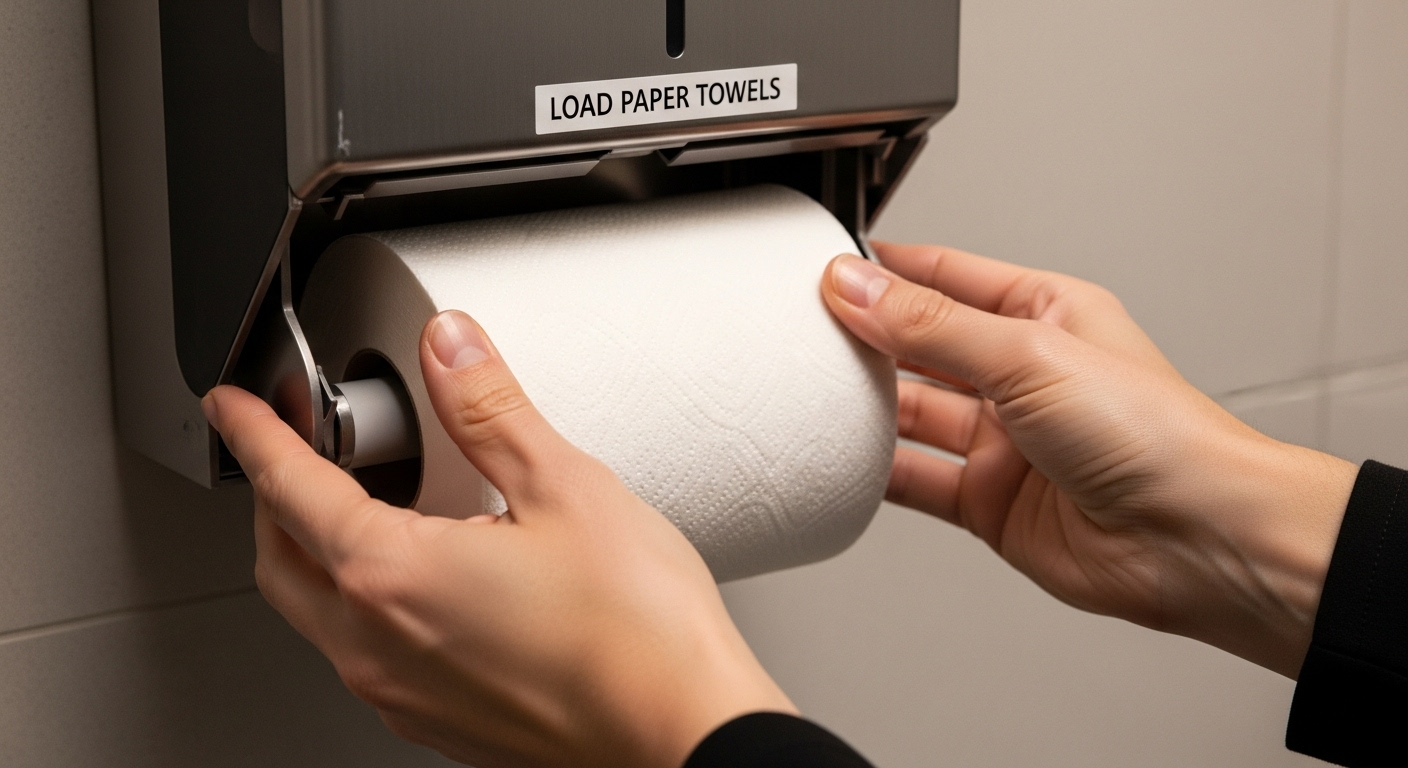
Step 4: Load Paper Towels into Dispenser
Loading paper towels into your dispenser is a nuanced process that requires attention to detail and understanding of your specific dispenser model. Proper loading ensures smooth dispensing and prevents common issues like jamming or uneven paper deployment. The goal is to create a seamless, user-friendly experience that maximizes the functionality of your newly installed paper towel system.
Begin by carefully examining the interior mechanism of your dispenser. Different models have unique loading mechanisms, so consulting the manufacturer’s instructions is crucial. Some dispensers require the paper towel roll to be placed in a specific orientation, with the core aligned precisely to ensure smooth rotation and dispensing. Gently handle the paper towel roll to prevent unnecessary crushing or misshaping of the paper.
When selecting paper towels for your dispenser, consider the roll size and type compatible with your specific model. Universal fit dispensers offer more flexibility, but some models are designed for specific roll dimensions. Check the interior width and height of the dispenser compartment to ensure a proper fit.
Carefully insert the paper towel roll into the dispenser, making sure it sits centered and can rotate freely without obstruction. Pay special attention to the paper’s leading edge, ensuring it feeds smoothly through the dispensing mechanism. Some models have a specific direction or orientation for the first sheet, so take a moment to align this correctly. Gently pull the first sheet through the dispensing slot to verify smooth movement and proper alignment.
If your dispenser has a spring-loaded or tension mechanism, you might need to carefully compress this mechanism while loading the roll. Move slowly and deliberately to prevent sudden release that could cause the roll to slip or become misaligned. Some dispensers feature a tension adjustment that allows you to customize the dispensing resistance for different paper towel weights and textures.
Verification steps for proper paper towel loading include:
- Roll sits centered in the dispenser
- First sheet pulls out smoothly
- No visible jamming or obstruction
- Roll rotates freely without catching
- Dispensing mechanism moves without resistance
By methodically following these loading instructions, you ensure your paper towel dispenser functions efficiently, providing convenient and reliable access to paper towels in your chosen environment.
Step 5: Test Dispenser Functionality
Testing your paper towel dispenser is the crucial final step that validates all your previous installation efforts. Comprehensive functionality testing ensures that your dispenser operates smoothly and meets performance expectations. This stage transforms your careful installation from a theoretical setup to a practical, working solution.
Begin the testing process by gently pulling the first paper towel sheet. The initial pull should be smooth and consistent, without excessive resistance or tearing. Watch how the paper towel advances and observe whether it separates cleanly from the roll. If the dispenser has multiple dispensing settings, test each mode to confirm uniform performance across different configurations.
Explore various kitchen dispenser options to understand the range of functionality available in modern dispensing systems. During your test, pay attention to the tension mechanism. A well-calibrated dispenser will provide controlled paper release without allowing excessive or insufficient paper to emerge.
Cycle through multiple paper towel pulls to verify consistent performance. Consistency is key - each pull should deliver a similar length of paper with minimal variation. Check for any signs of mechanical interference, such as paper getting stuck, uneven tearing, or difficulty advancing the roll. These early tests can reveal potential adjustments needed in mounting or loading.
Pay special attention to the dispenser’s mounting stability during testing. As you pull paper towels, observe whether the dispenser remains securely attached to the wall. Any wobbling, shifting, or slight movement could indicate that the mounting bracket needs additional tightening or reinforcement. Gentle but firm pulls should not compromise the dispenser’s position.
Verification checklist for dispenser functionality includes:
- Smooth paper towel extraction
- Clean, consistent sheet separation
- No mechanical resistance or jamming
- Stable wall mounting during use
- Uniform paper advancement across multiple pulls
If you encounter any issues during testing, do not hesitate to make minor adjustments. Slight modifications to the mounting bracket tension, paper roll positioning, or dispensing mechanism can often resolve initial performance challenges.
For easy, at-a-glance troubleshooting, this table outlines common paper towel dispenser issues, possible causes, and recommended solutions based on content in the guide.
| Problem | Possible Cause | Solution |
|---|---|---|
| Paper towels not dispensing | Roll misaligned or jammed | Re-center roll; ensure leading edge feeds freely |
| Dispenser wobbles during use | Loose or uneven mounting bracket | Tighten screws; verify bracket is level |
| Excessive force needed to tear | Paper tension too high or misaligned | Adjust roll orientation; align perforation |
| Paper tears unevenly | Paper not loaded correctly | Reload; ensure proper orientation and tension |
| Dispenser shifts on wall | Inadequate anchoring or overtightening | Check wall anchors; reinstall if necessary |
Step 6: Verify Proper Installation and Usage
Verifying proper installation and usage represents the final checkpoint in your paper towel dispenser setup process. This comprehensive review ensures that all previous installation steps have been executed correctly and the dispenser will provide reliable, efficient service. A meticulous verification process can prevent potential issues and extend the longevity of your paper towel dispensing system.
Begin by conducting a comprehensive visual inspection of the entire installation. Look for subtle signs that might indicate misalignment or improper mounting. Check that the mounting bracket remains perfectly horizontal and that the dispenser sits flush against the wall with no visible gaps or slight tilting. Run your hand along the edges to confirm a smooth, secure attachment that doesn’t wobble or shift under gentle pressure.
For additional insights into maintaining kitchen dispensers, consider the environmental factors surrounding your installation. Assess the immediate area for potential challenges like moisture exposure, temperature fluctuations, or proximity to high-traffic zones that might impact the dispenser’s performance. These environmental considerations are crucial for long-term functionality and maintenance.
Test the dispenser’s mechanical performance under different usage scenarios. Pull paper towels at various speeds and with different levels of tension to simulate real-world usage patterns. Pay close attention to how the paper advances - it should move smoothly without excessive resistance or unexpected jerking motions. Verify that the paper tears cleanly at the perforation without requiring excessive force or leaving ragged edges.
Evaluate the dispenser’s accessibility and user-friendliness. Consider the perspective of different potential users, including children, elderly individuals, or those with limited hand mobility. The dispensing mechanism should operate with minimal effort, allowing smooth paper extraction without requiring significant hand strength or complex manipulation.
Key verification points for proper installation and usage include:
- Mounting bracket remains completely level
- Dispenser sits flush against wall
- Paper towels advance smoothly
- Tear mechanism functions cleanly
- No visible mounting or mechanical issues
- Accessible to users of various abilities
Remember that proper installation is just the beginning. Regular maintenance, periodic checks, and attentive usage will ensure your paper towel dispenser continues to function efficiently. By investing time in this thorough verification process, you create a reliable, user-friendly solution that meets both practical and aesthetic requirements in your chosen space.
Elevate Your Setup With Cozee Bay’s Sustainable Bamboo Solutions
After learning how precise installation, secure mounting, and reliable functionality are critical for a frustration-free paper towel dispenser experience, it is easy to see how quality makes all the difference. Struggling with flimsy plastic dispensers, inconsistent mounting, or jams can cost you time and peace of mind. A well-designed dispenser is not just about holding paper—it is about transforming your space with confidence and lasting performance.
Looking for a paper towel dispenser that blends eco-friendly materials, style, and everyday practicality? Explore our Cozee Bay Paper Towel Dispenser with Adapter and Top Lid category, where every model is crafted from premium bamboo for superior durability and easy installation. Whether you need a solution for your kitchen, commercial office, or high-traffic bathroom, our handcrafted designs create a natural upgrade over ordinary dispensers.

Ready to make your next installation the smoothest yet? Visit Cozee Bay and see how our sustainable products, free shipping, and money-back guarantee can remove the guesswork and bring lasting value to your home or business. Select your ideal style, review trusted customer feedback, and enjoy a seamless shopping experience. Your next step to a reliable paper towel dispenser begins now.
Frequently Asked Questions
How do I choose the right location for my paper towel dispenser?
Selecting the right location involves considering accessibility, proximity to sinks, and avoiding excessive moisture. Ensure it’s mounted between 15 to 48 inches from the floor for compliance with accessibility guidelines.
What tools do I need to install a paper towel dispenser?
You will need a Phillips head screwdriver, measuring tape, pencil, level, and possibly wall anchors or specialized screws depending on the wall material where you are mounting the dispenser.
How can I ensure my paper towel dispenser is securely mounted?
Make sure to use a level when marking and installing the mounting bracket. Check for stability and ensure that all screws are tightened uniformly, without overtightening to avoid damaging the wall.
What should I do if my paper towel dispenser isn’t dispensing smoothly?
Check the roll positioning and ensure it’s centered. Make sure the leading edge feeds smoothly and there are no obstructions. Also, verify that the dispenser is securely mounted, as instability can affect functionality.
Recommended
Leave a comment
Comments will be approved before showing up.